Assigning a Student to a License
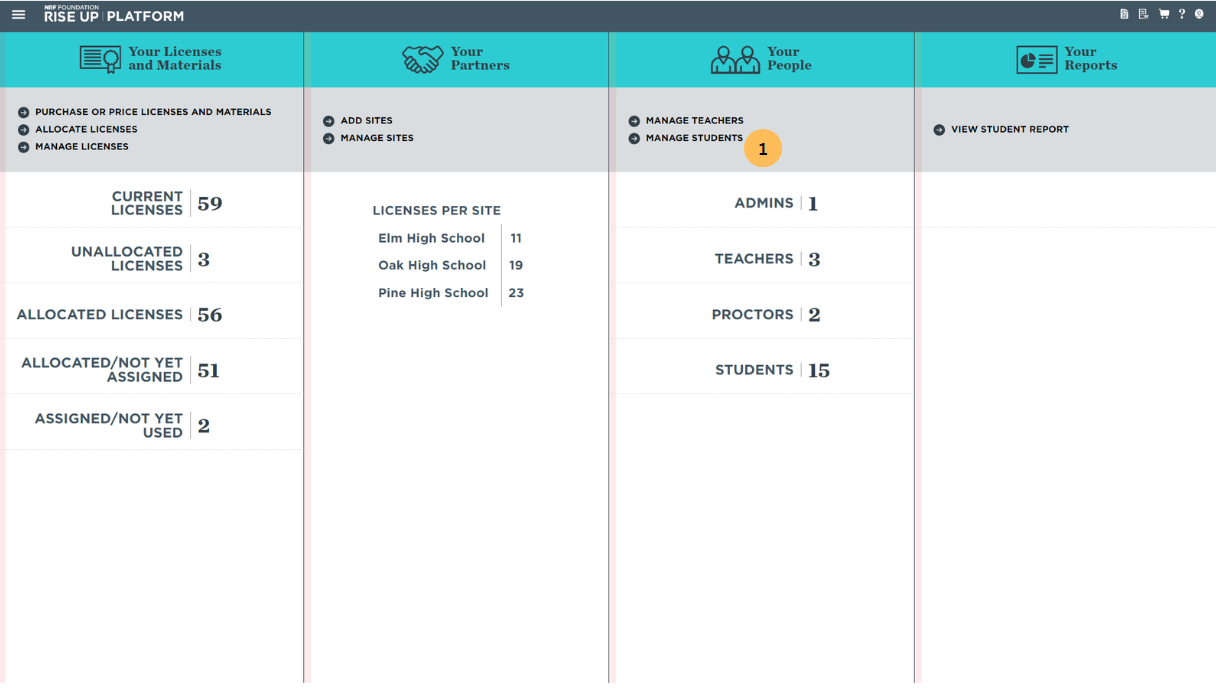
1. Click MANAGE STUDENTS on the dashboard, or select it from the menu in the upper-left corner.
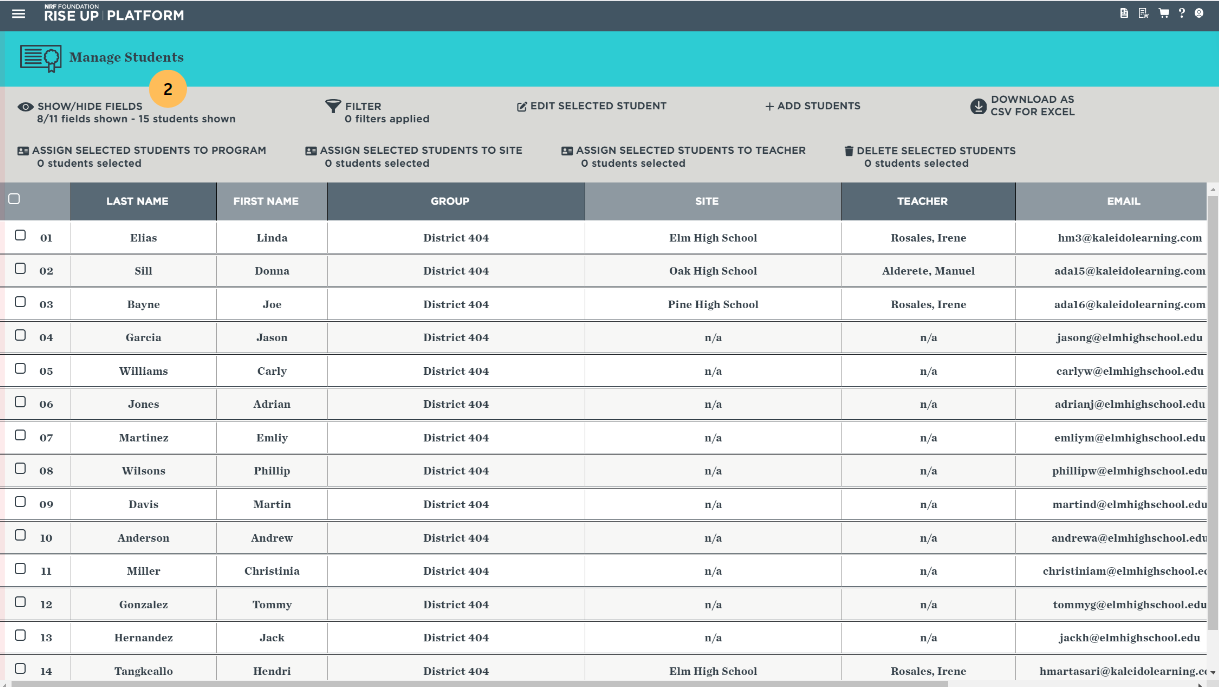
2. On the Manage Students page, identify one or more students to whom you'd like to assign a license. To help narrow down your search, you can:
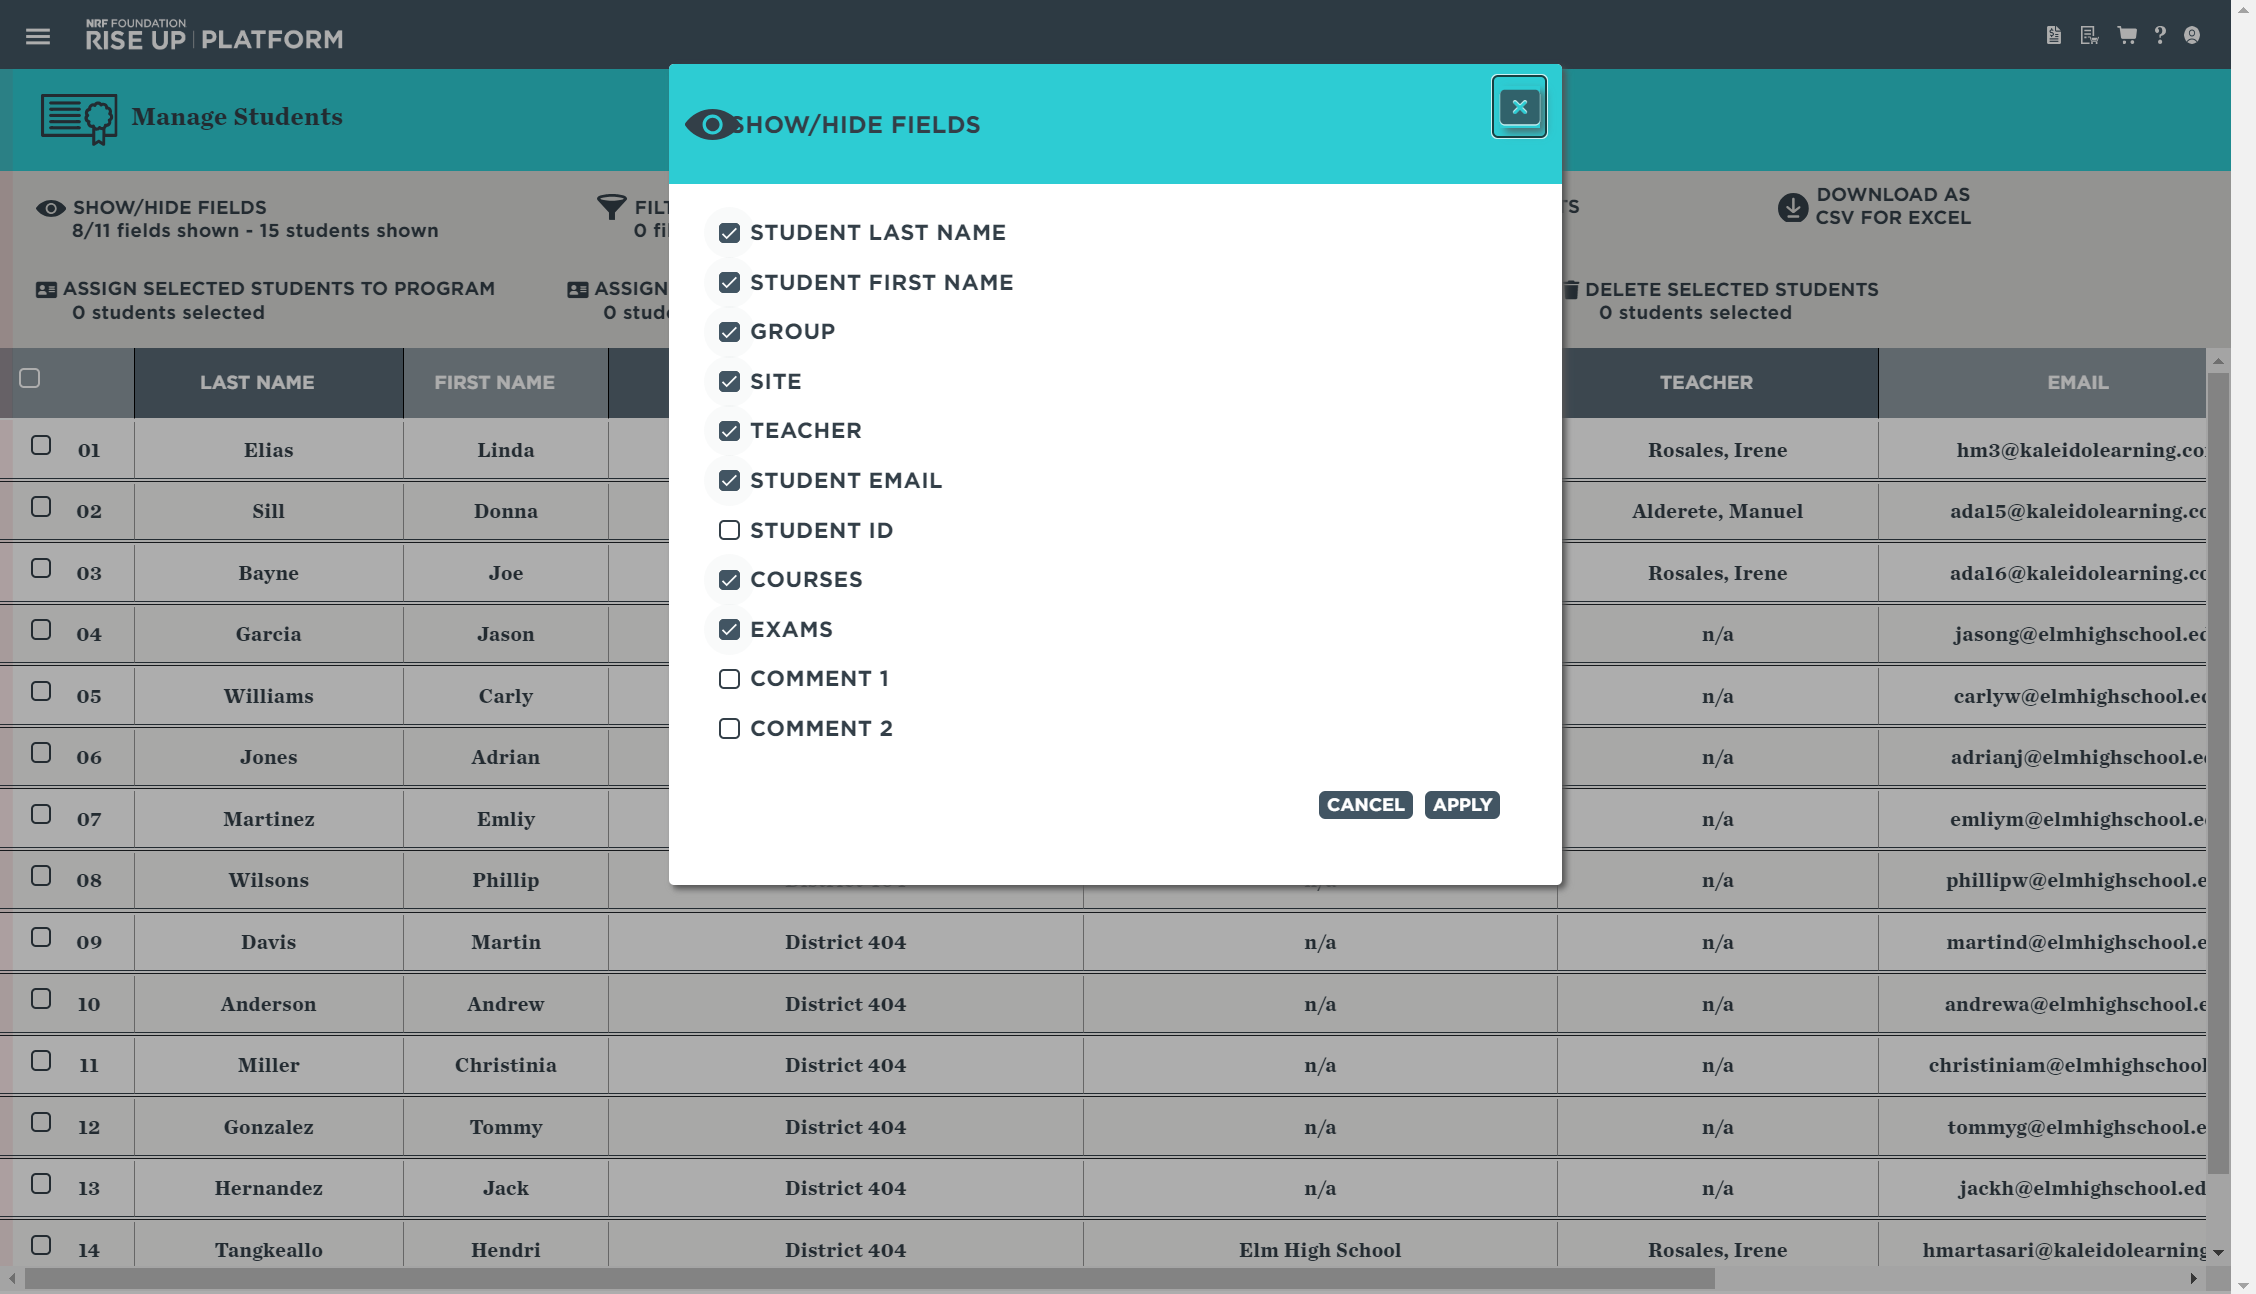
- Use the SHOW/HIDE FIELDS feature to customize the amount of information displayed about each student, helping you determine which students you want to assign licenses to;
- Use the FILTER feature to search for specific students based on criteria such as Course or Group; and
- Click on the column headings to sort the list of students.
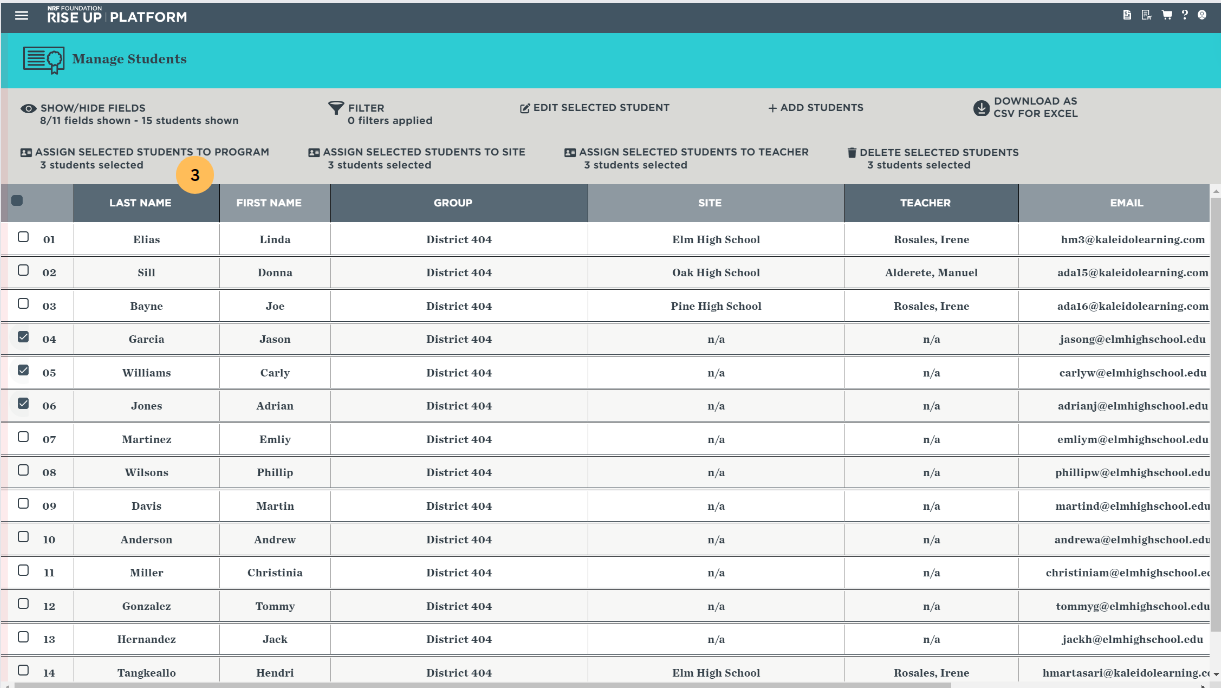
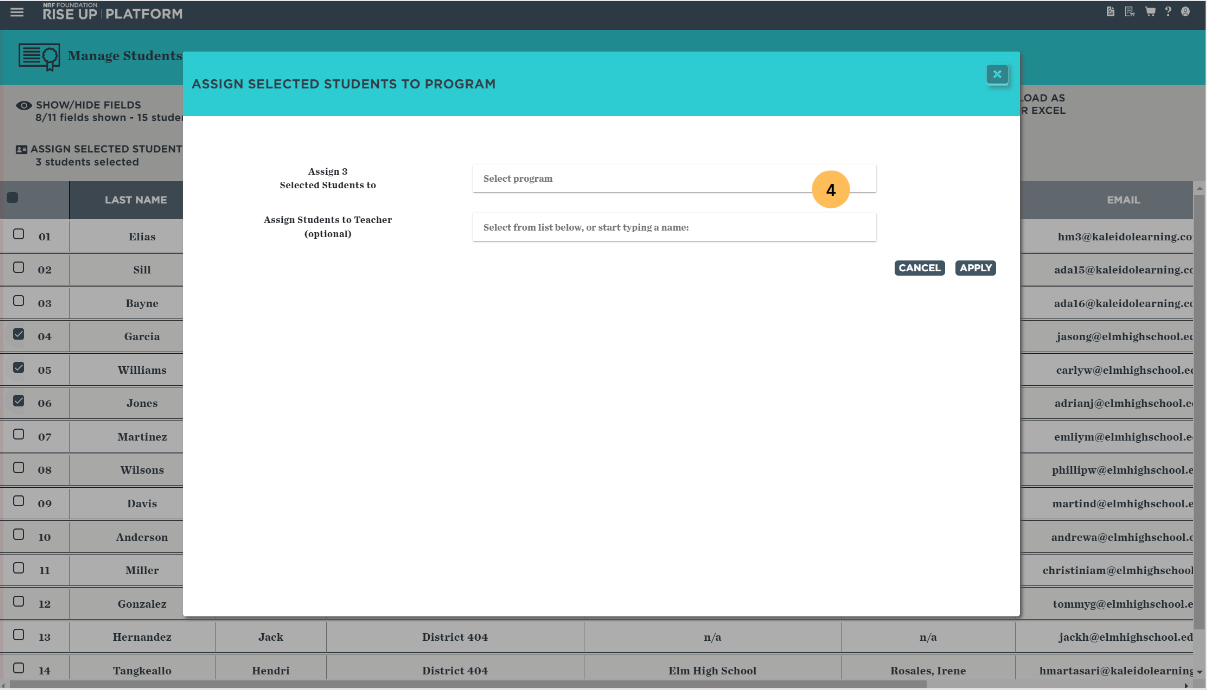
3. Click ASSIGN SELECTED STUDENTS TO PROGRAM. A dialog box will appear showing the available programs(licenses). Note that you can only assign students to one license at a time.
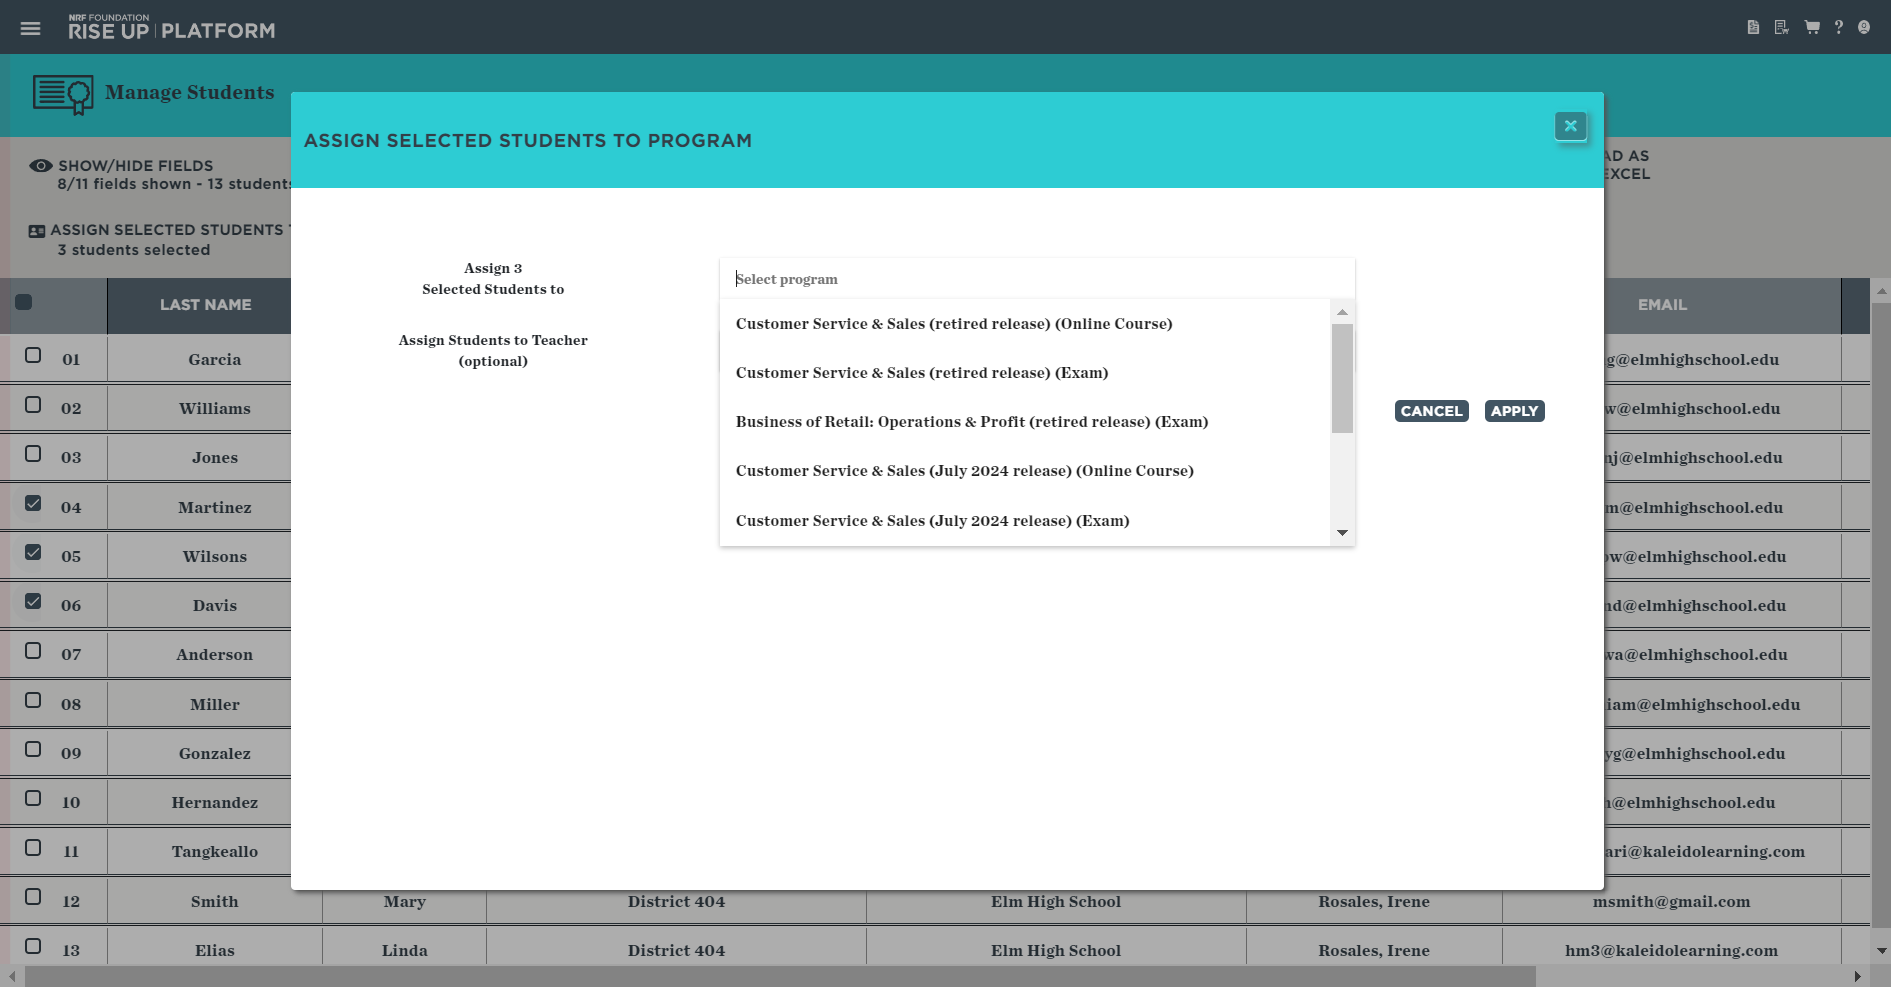
4. Select the license you want from the list.
Additionally, you have the option to assign students to teachers from this same dialog box. If you'd
like to do this, select the teacher's name from the list, or start typing part of the teacher's name
and
then select it.
5. A dialog box confirming that the students have been successfully assigned to the program. Click OK to return to the Manage Students page. The programs will be immediately available for the student.