Allocating Licenses
Allocating multiple licenses of one kind at once can be done from the Allocate Licenses page. Allocating a selection of licenses can be done from the Manage Licenses page.
To allocate multiple licenses:
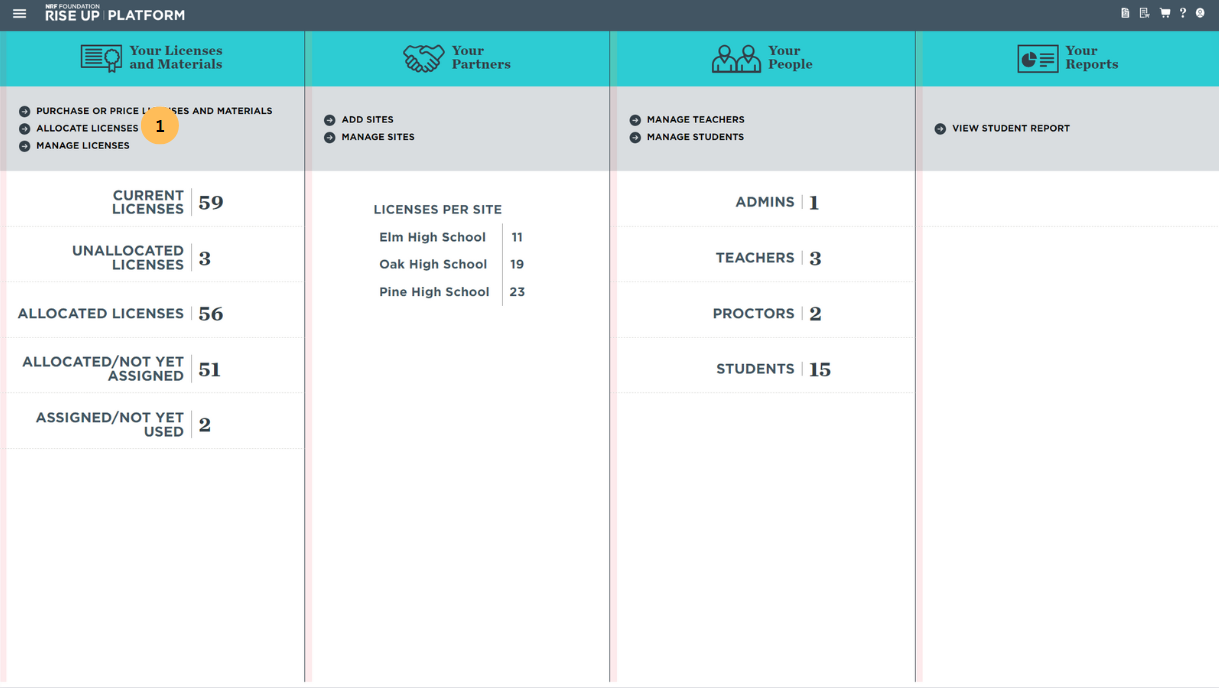
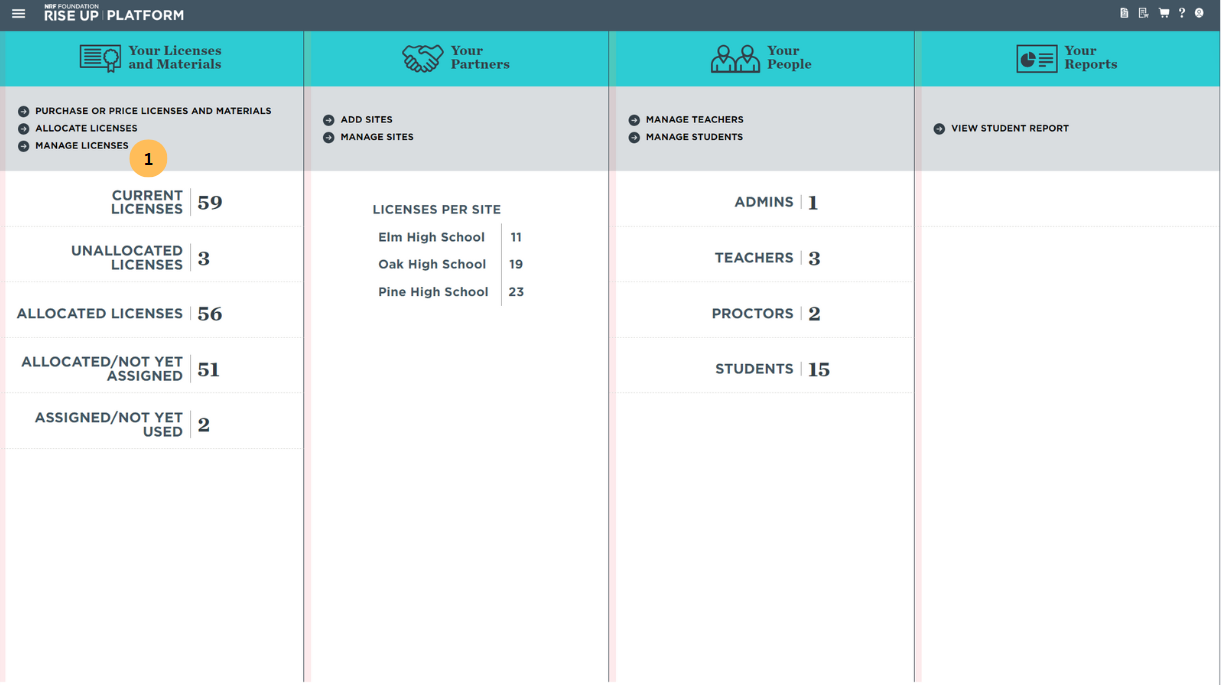
1. Click ALLOCATE LICENSES on the dashboard in the first column under Your Licenses and Materials or select it from the menu in the upper-left corner. You can also click GO TO LICENSE ALLOCATION from the Manage Licenses Page.
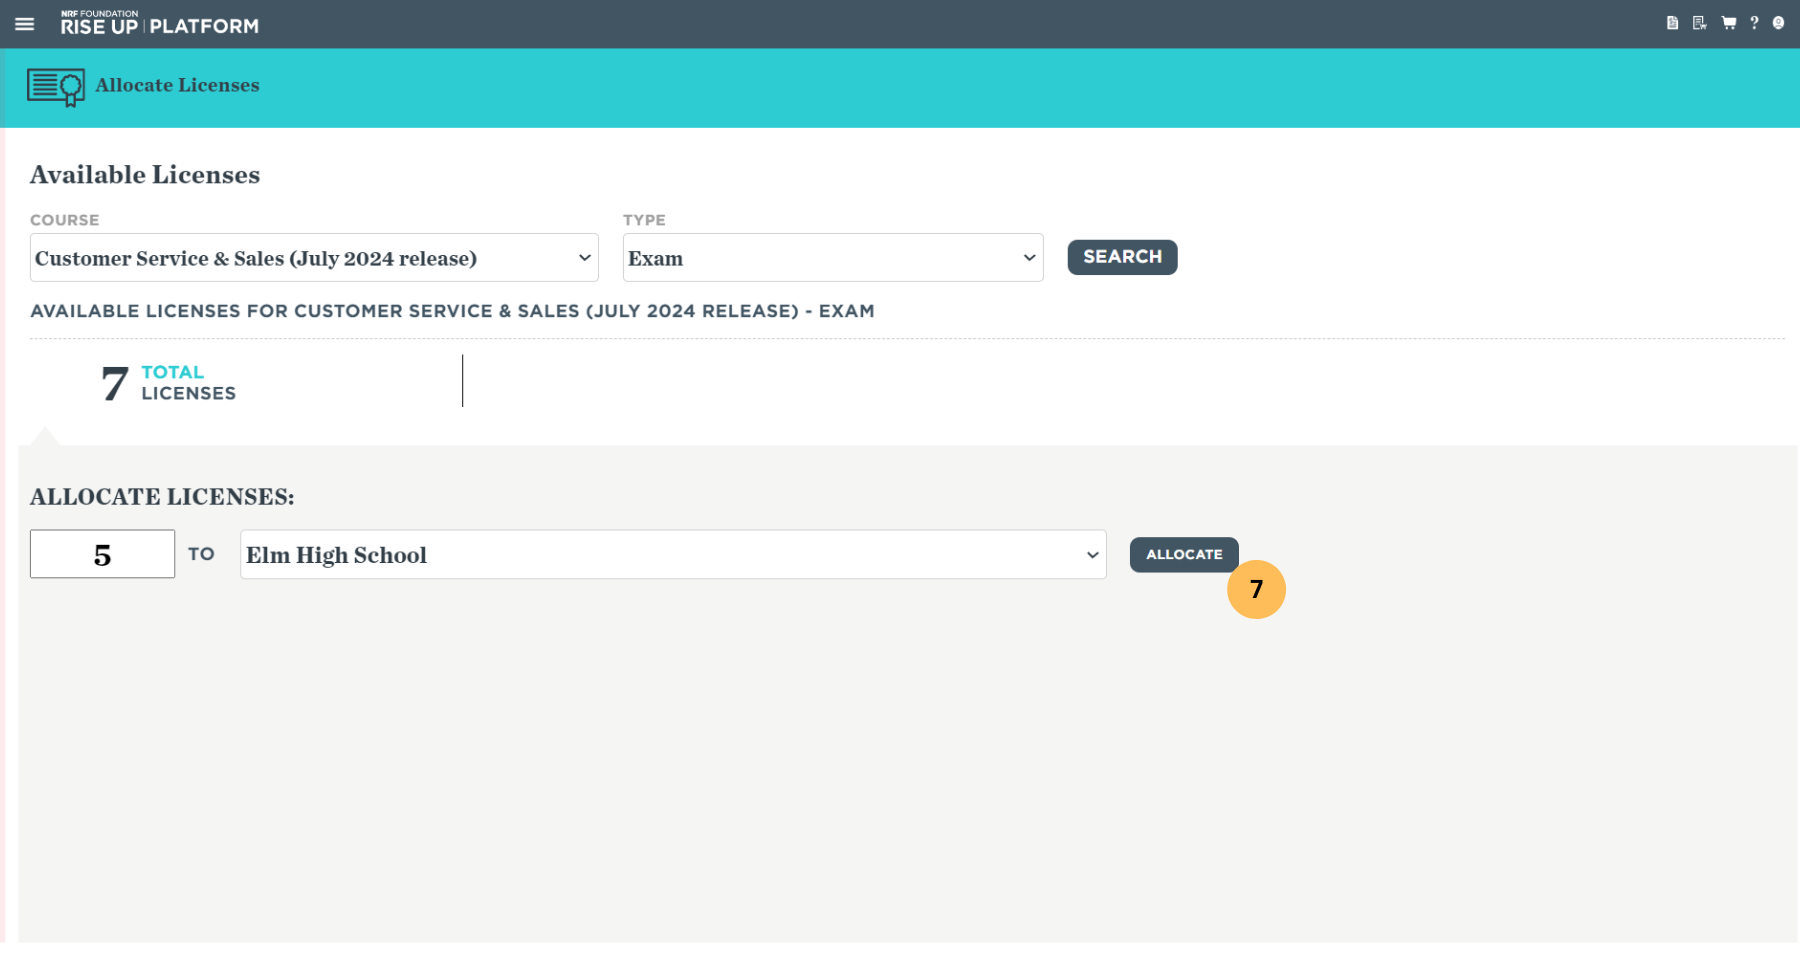
2. On the Allocate Licenses page, select the course name and license type you want to allocate.
3. Select the type of program.
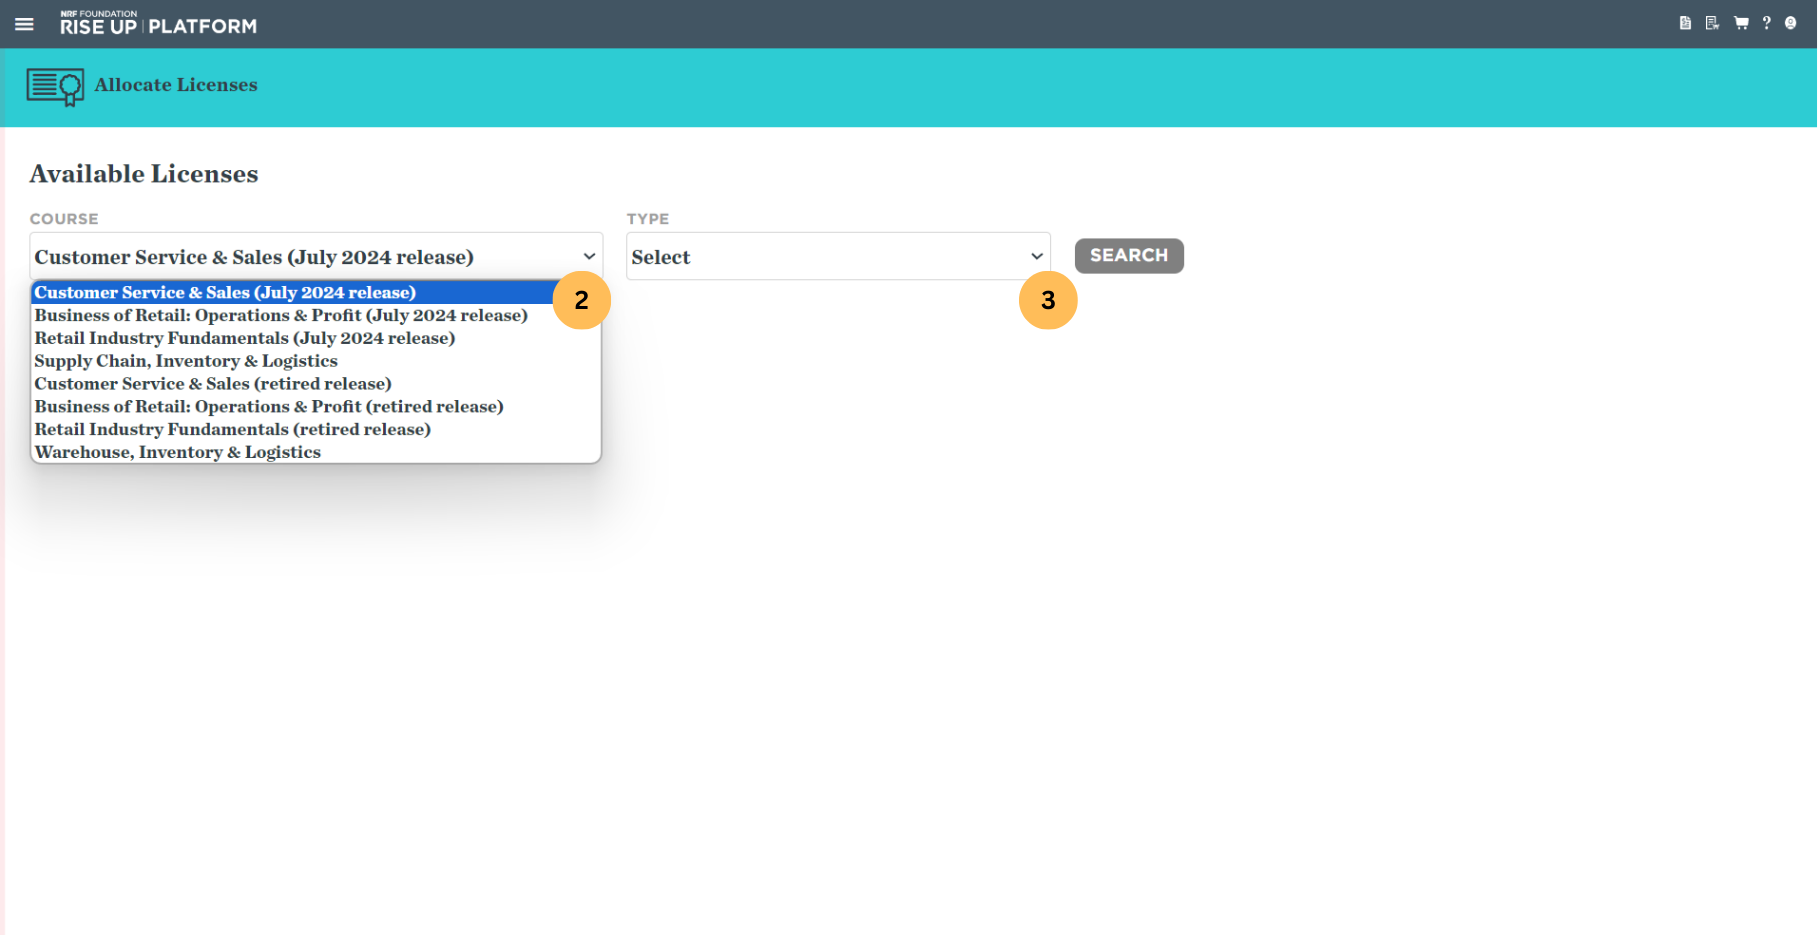
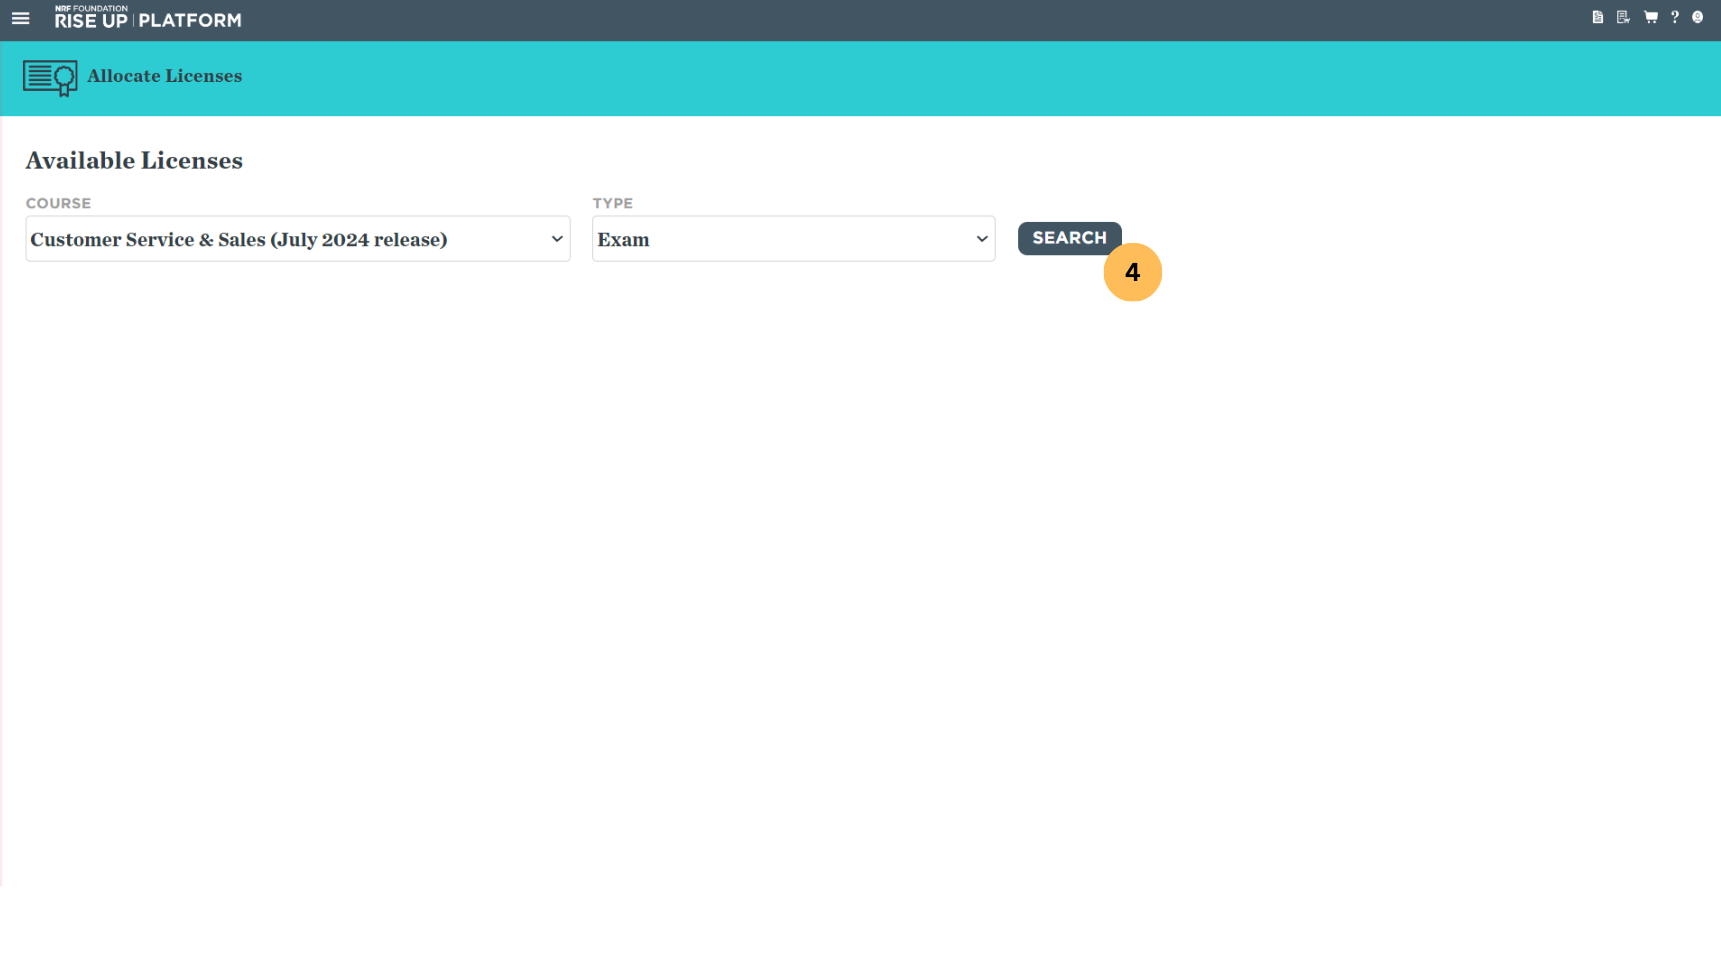
4. Click SEARCH to find the number of licenses available to allocate.
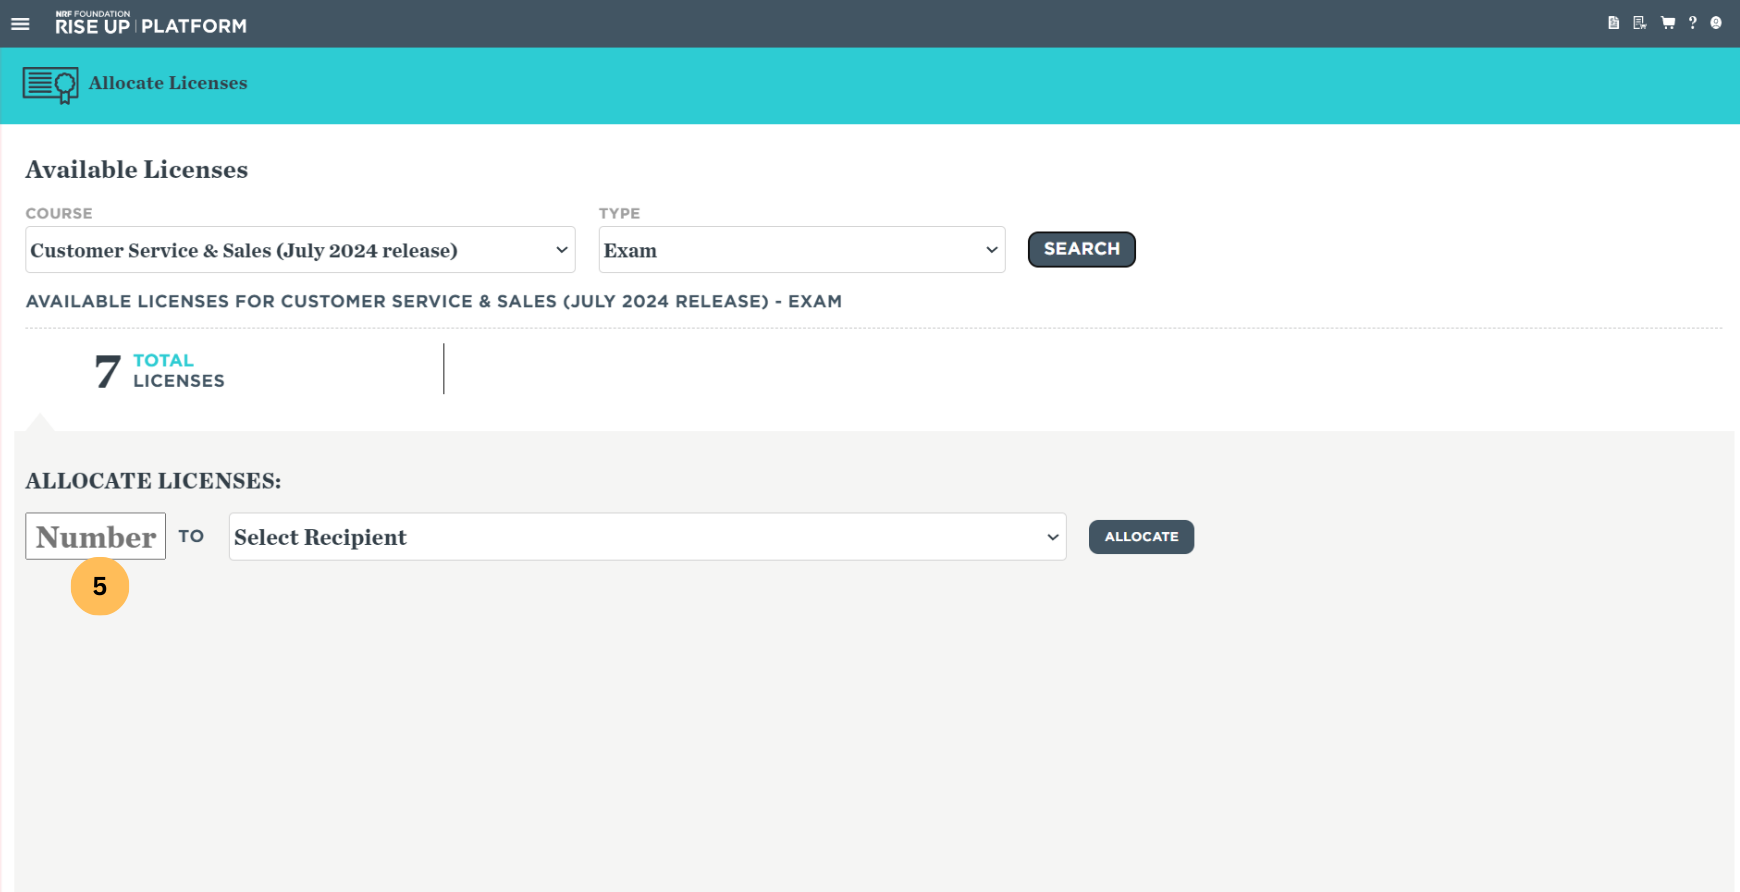
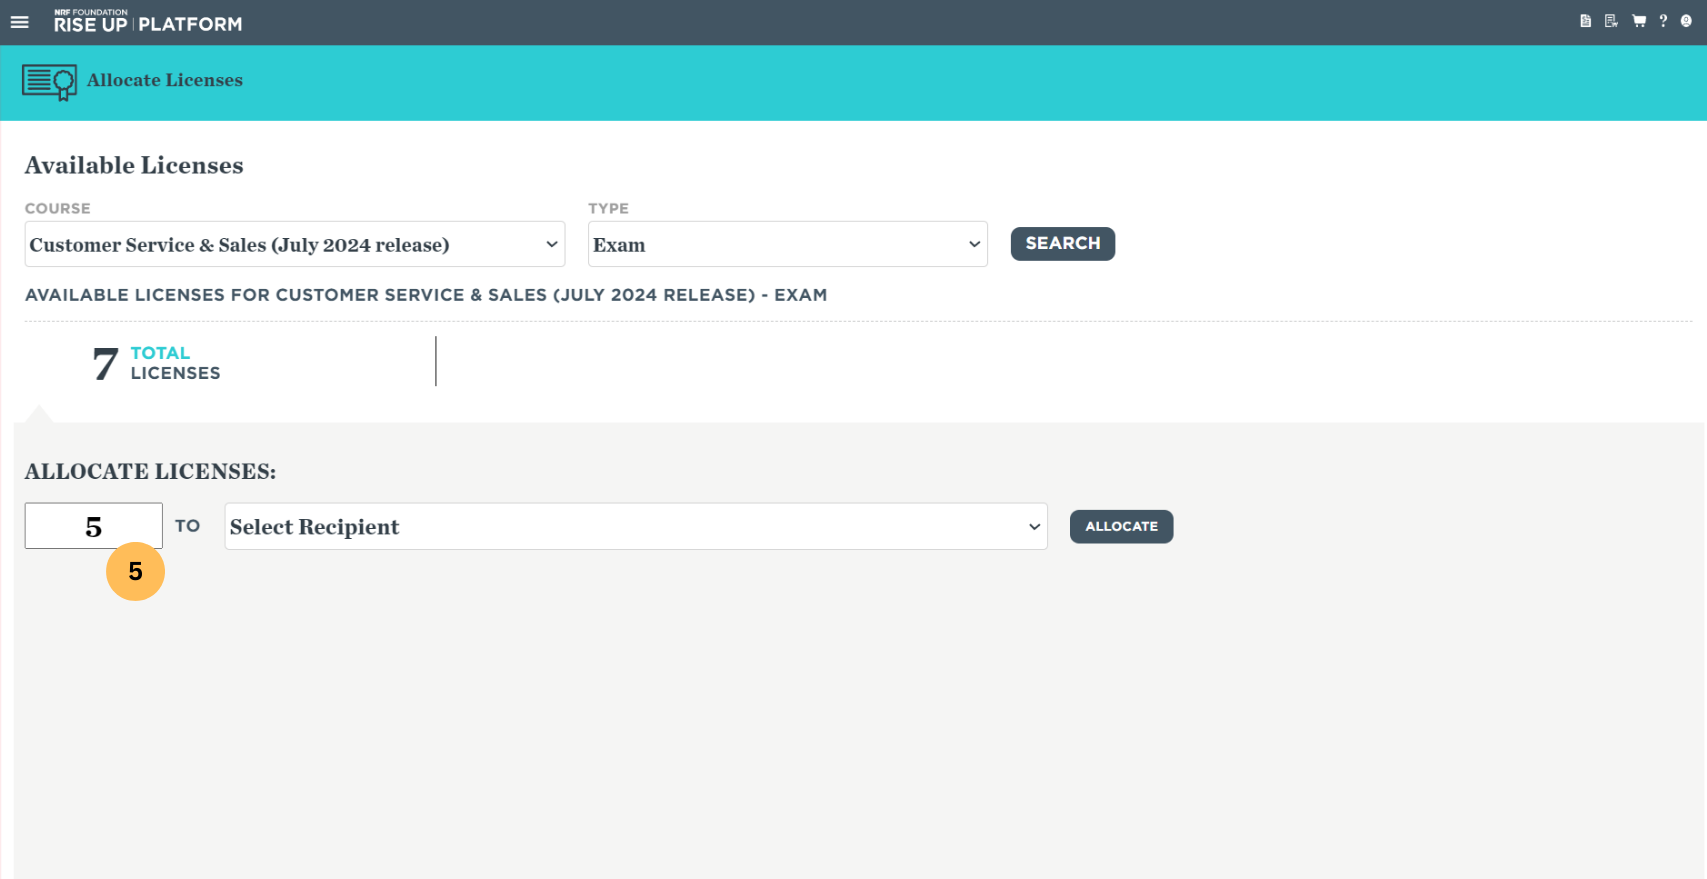
5. Enter the number of licenses you'd like to allocate into the Quantitiy field. You can only allocate up to as many licenses that are shown as available in the search results.
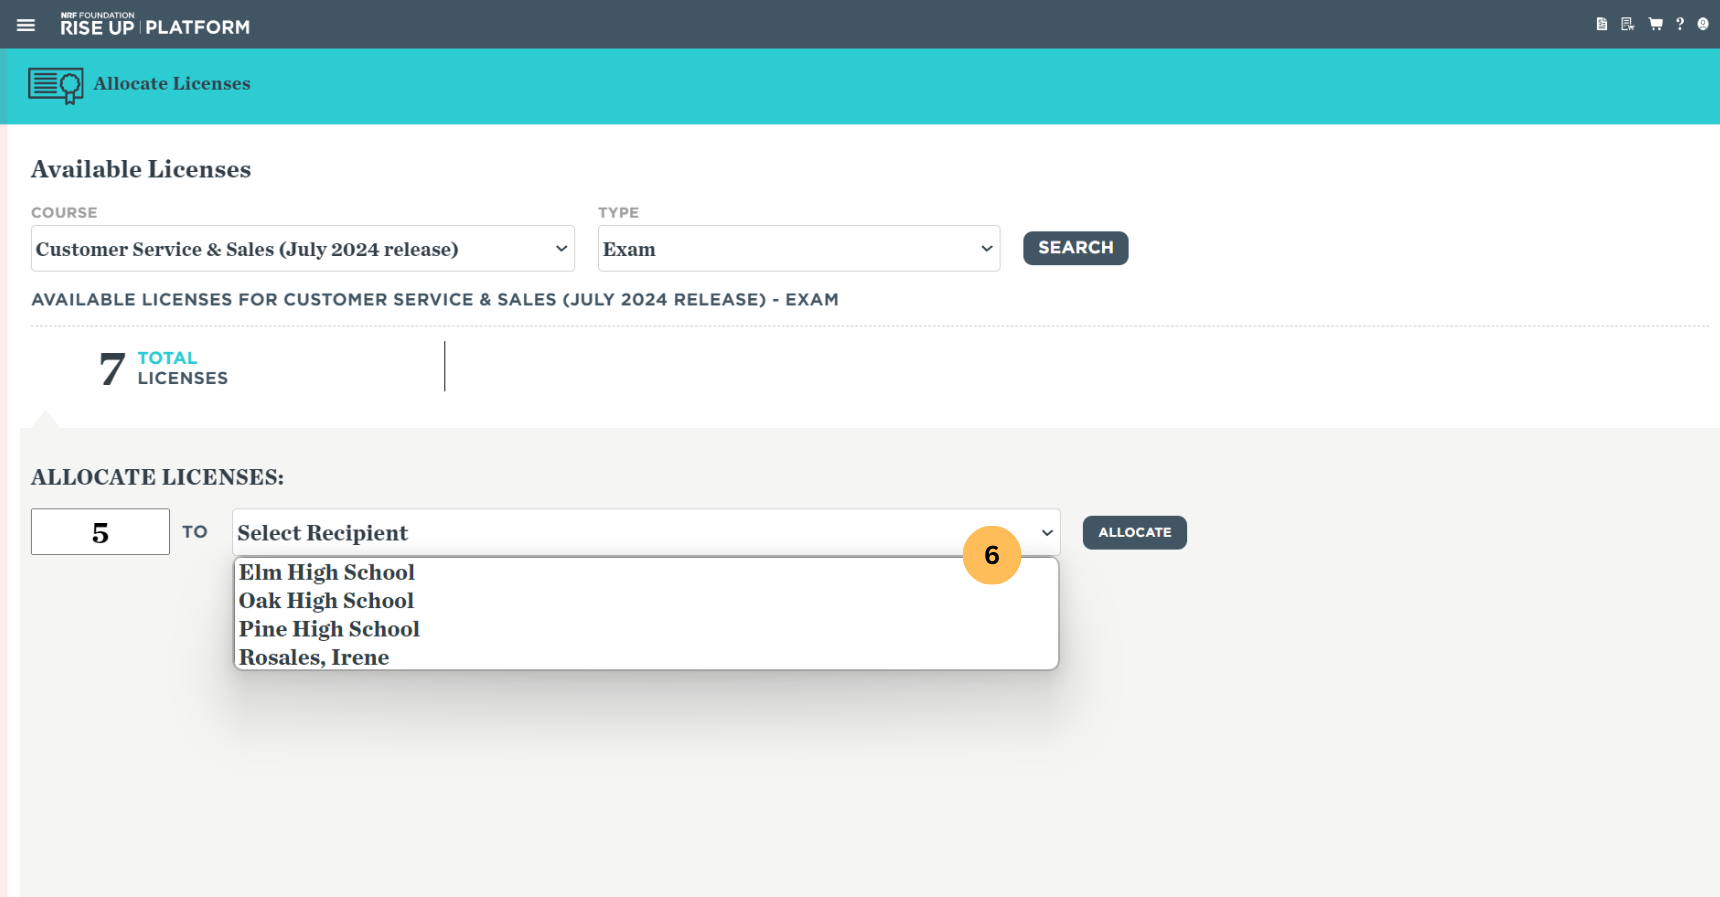
6. Select the organization or the teacher you wish to allocate the licenses to from the Select Recipient drop-down menu. Please contact the RISE Up customer support team if you would like to allocate licenses to a recipient not in this list (kindly provide the following information to our support team: your full name, email address and organization name, as well as the name and the email address of the recipient you wish to allocate licenses to).
7. Click ALLOCATE to allocate those licenses to the selected recipient.
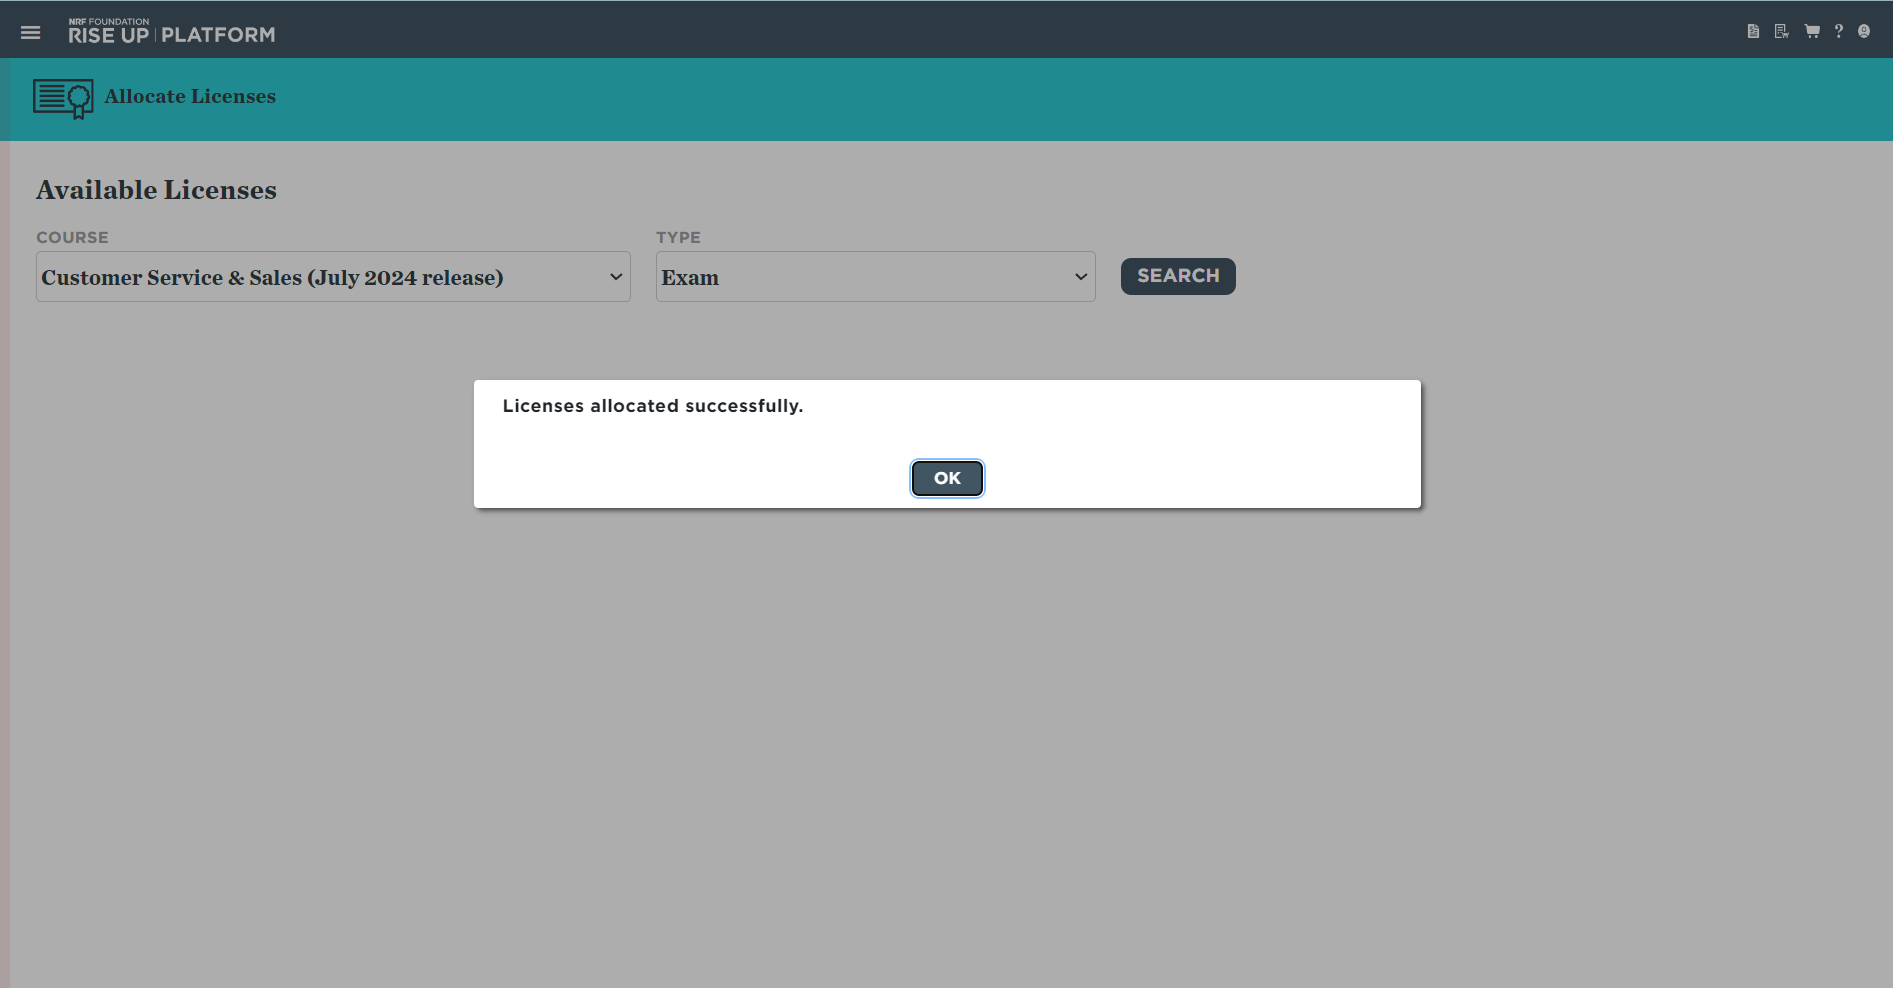
8. A dialog box confirming that the licenses have been successfully allocated will appear. Click OK to return to the Allocate Licenses menu. These licenses will be deducted from your available licenses and will be available to the recipient immediately, and they will still appear in your list on the Manage Licenses page in case you want to withdraw them or check their status.
To allocate specific licenses:
1. Click MANAGE LICENSES on the dashboard, or select it from the menu in the upper-left corner.
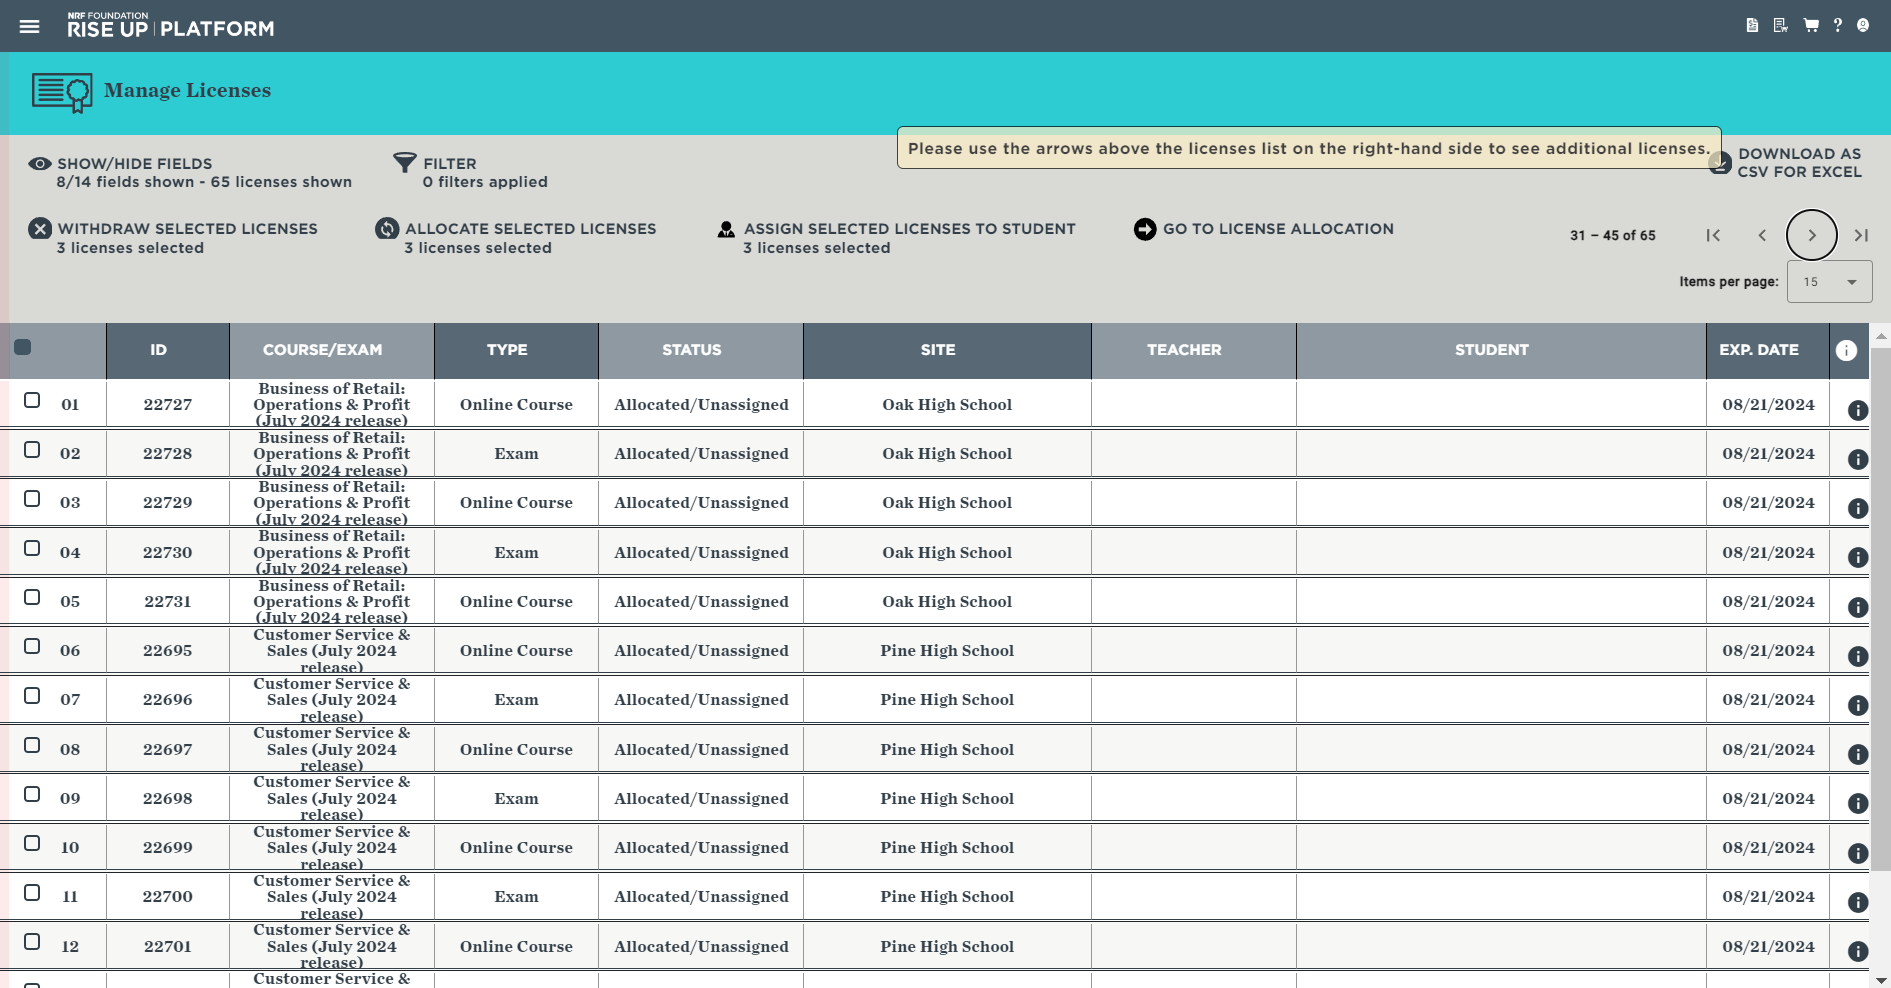
2. On the Manage Licenses page, identify and select the license(s) you want to allocate. To help you
find the licenses, you can:
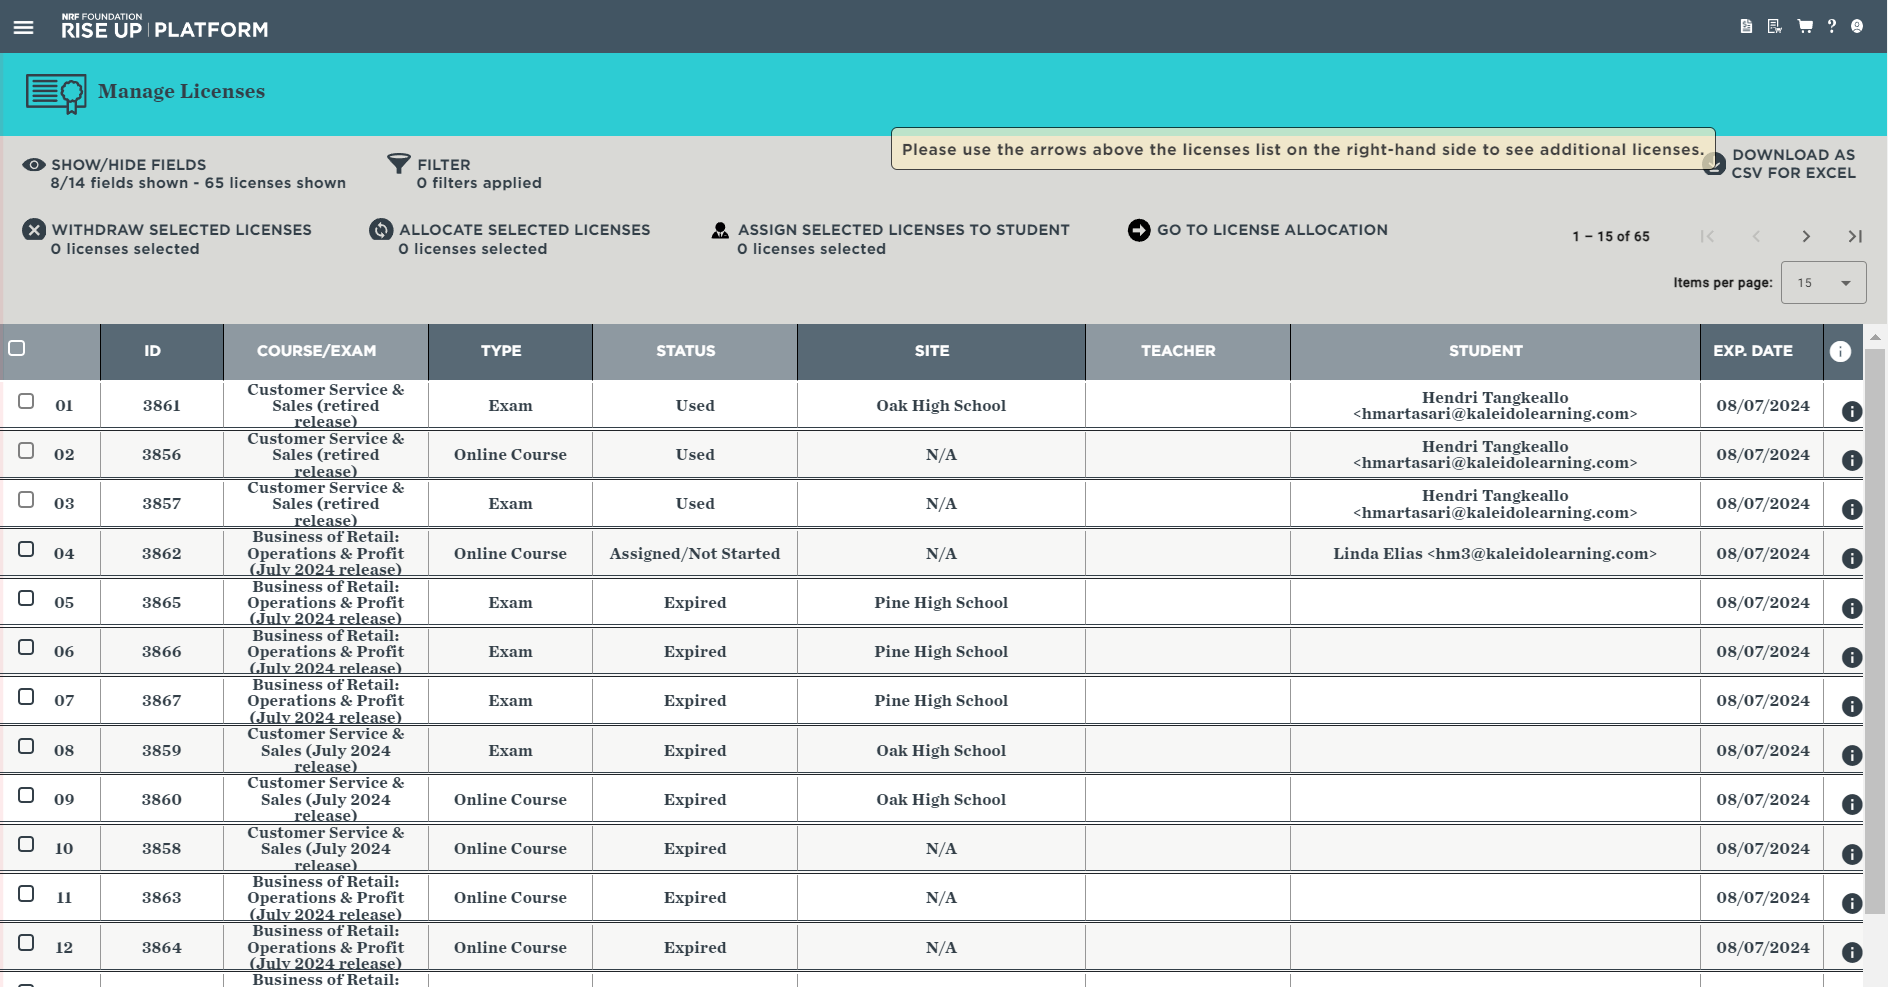
- Use the SHOW/HIDE FIELDS feature to see more or less about each license;
- Use FILTER to help narrow down the list of licenses; and
- Click on the column headings to sort the list of licenses.
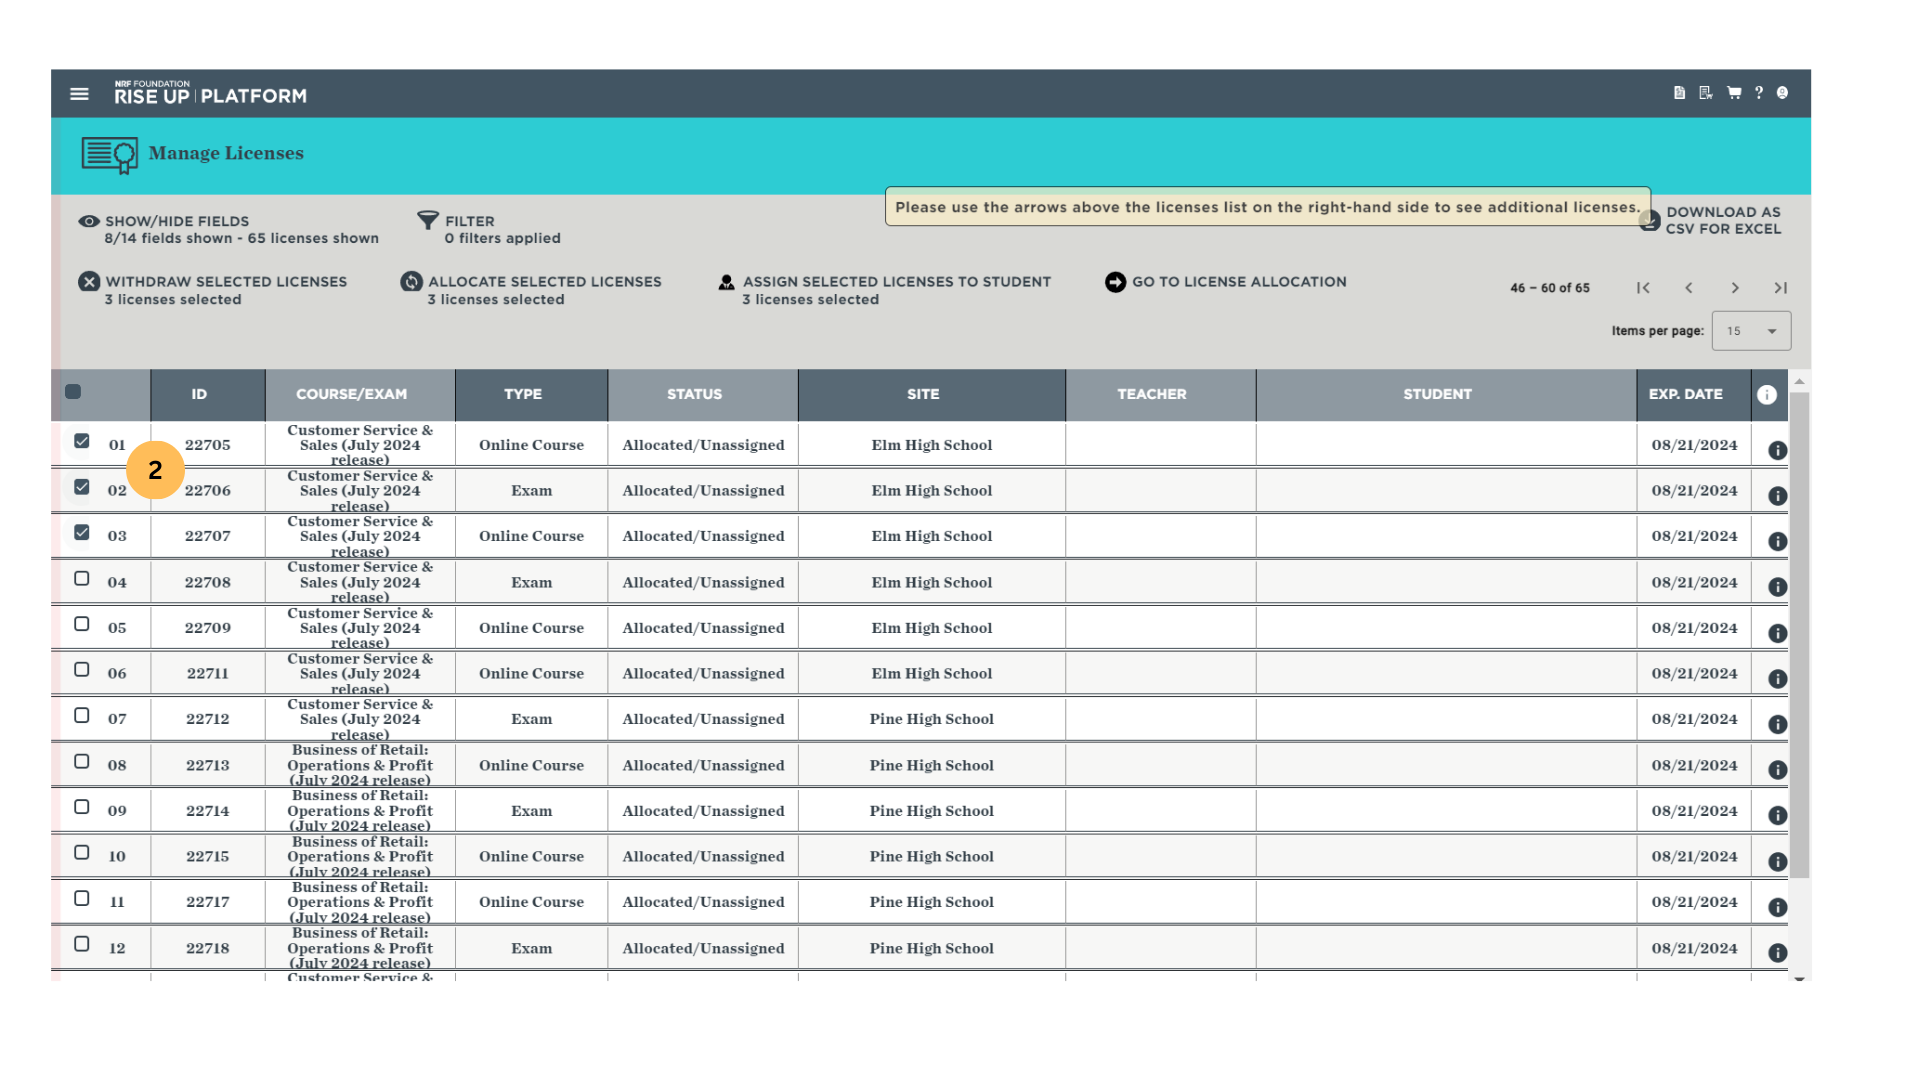
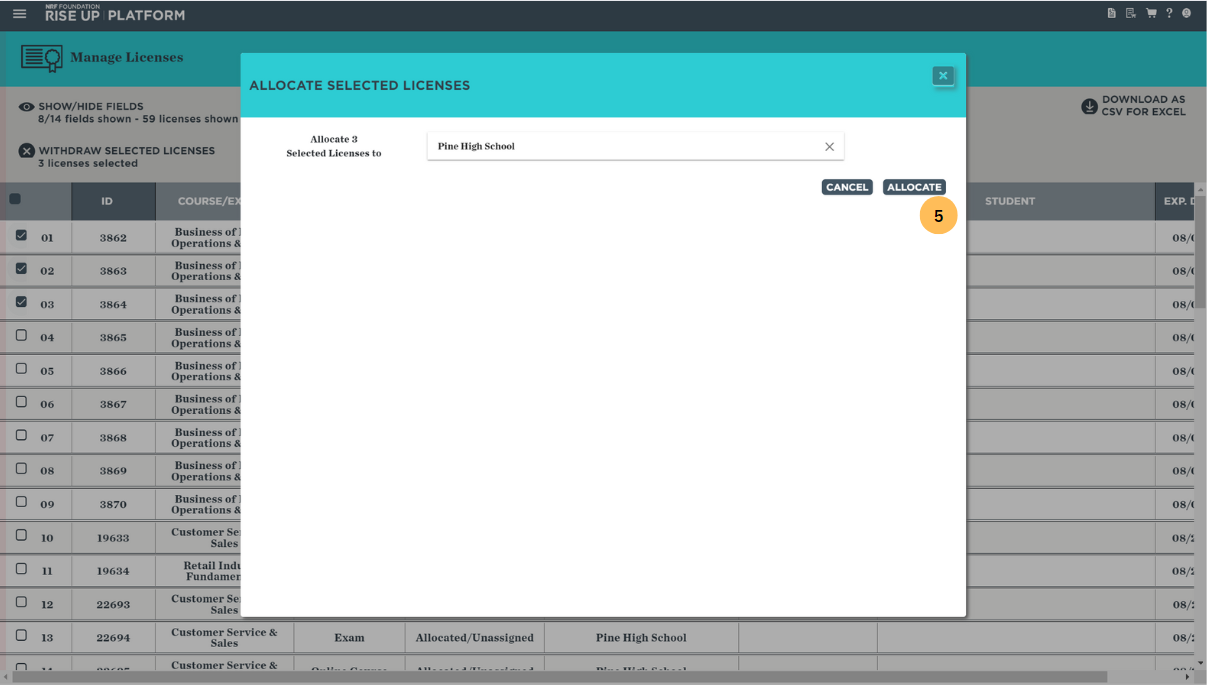
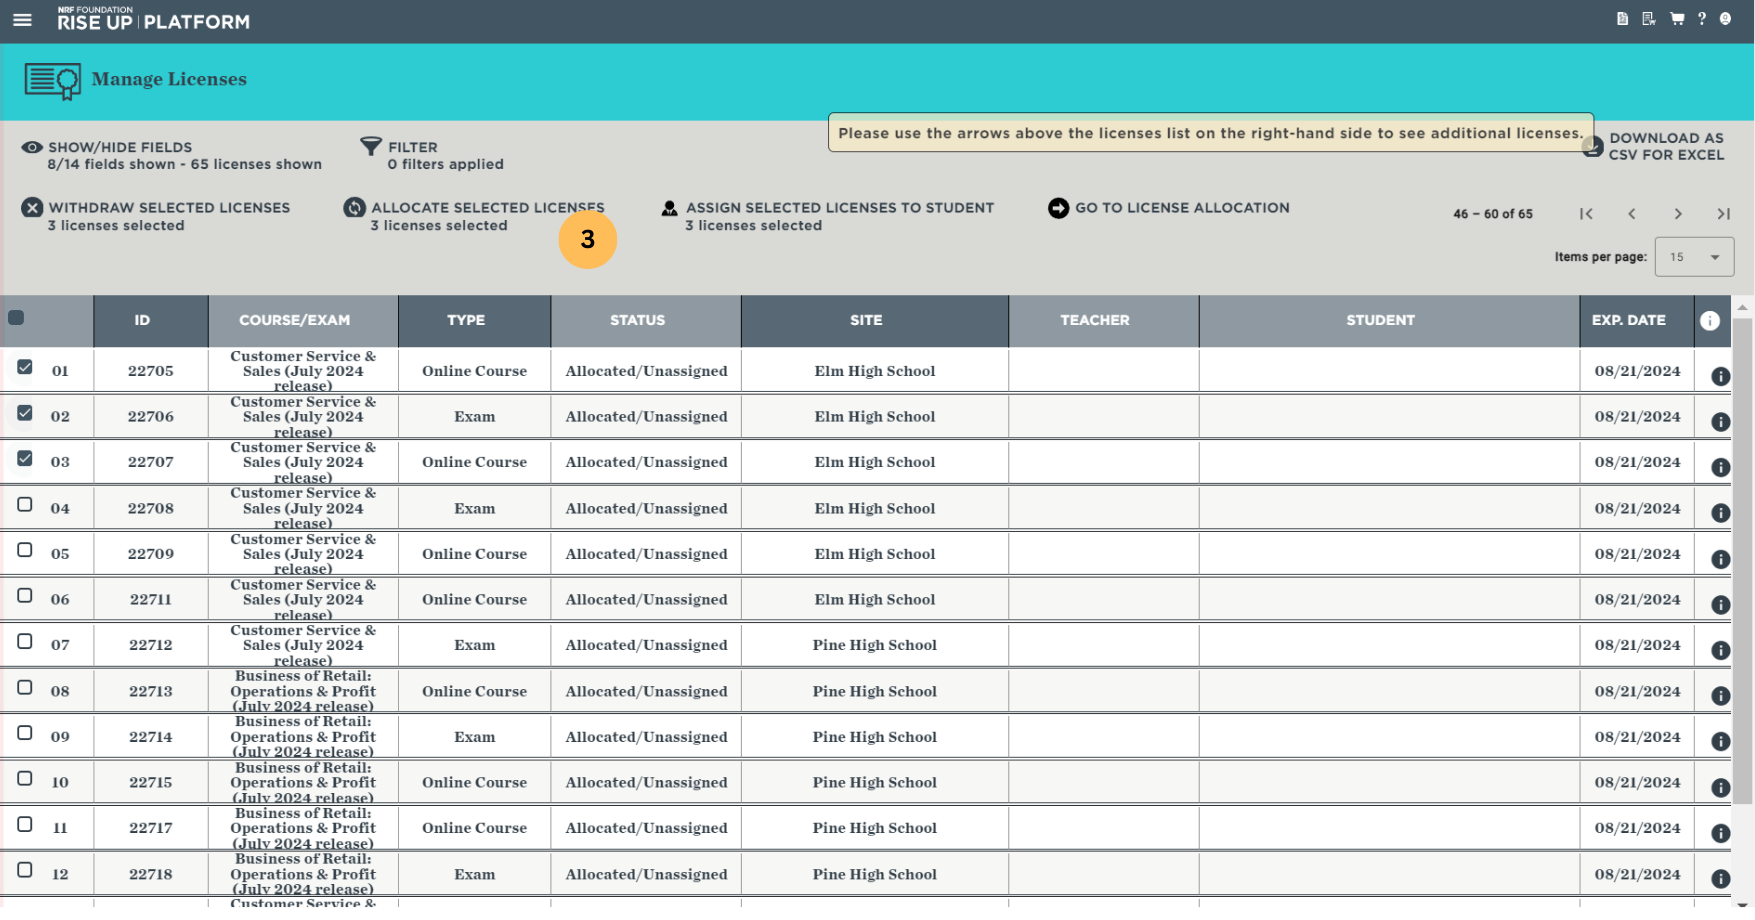
3. Click ALLOCATE SELECTED LICENSES from the menu options. A dialog box with available organizations will appear.
4. Select the organization you'd like to allocate the licenses to from the drop-down menu. Please contact Customer Support if you would like to allocate licenses to a recipient not in this list (kindly provide the following information to our support team: your full name, email address and organization name, as well as the name and the email address of the recipient you wish to allocate licenses to).
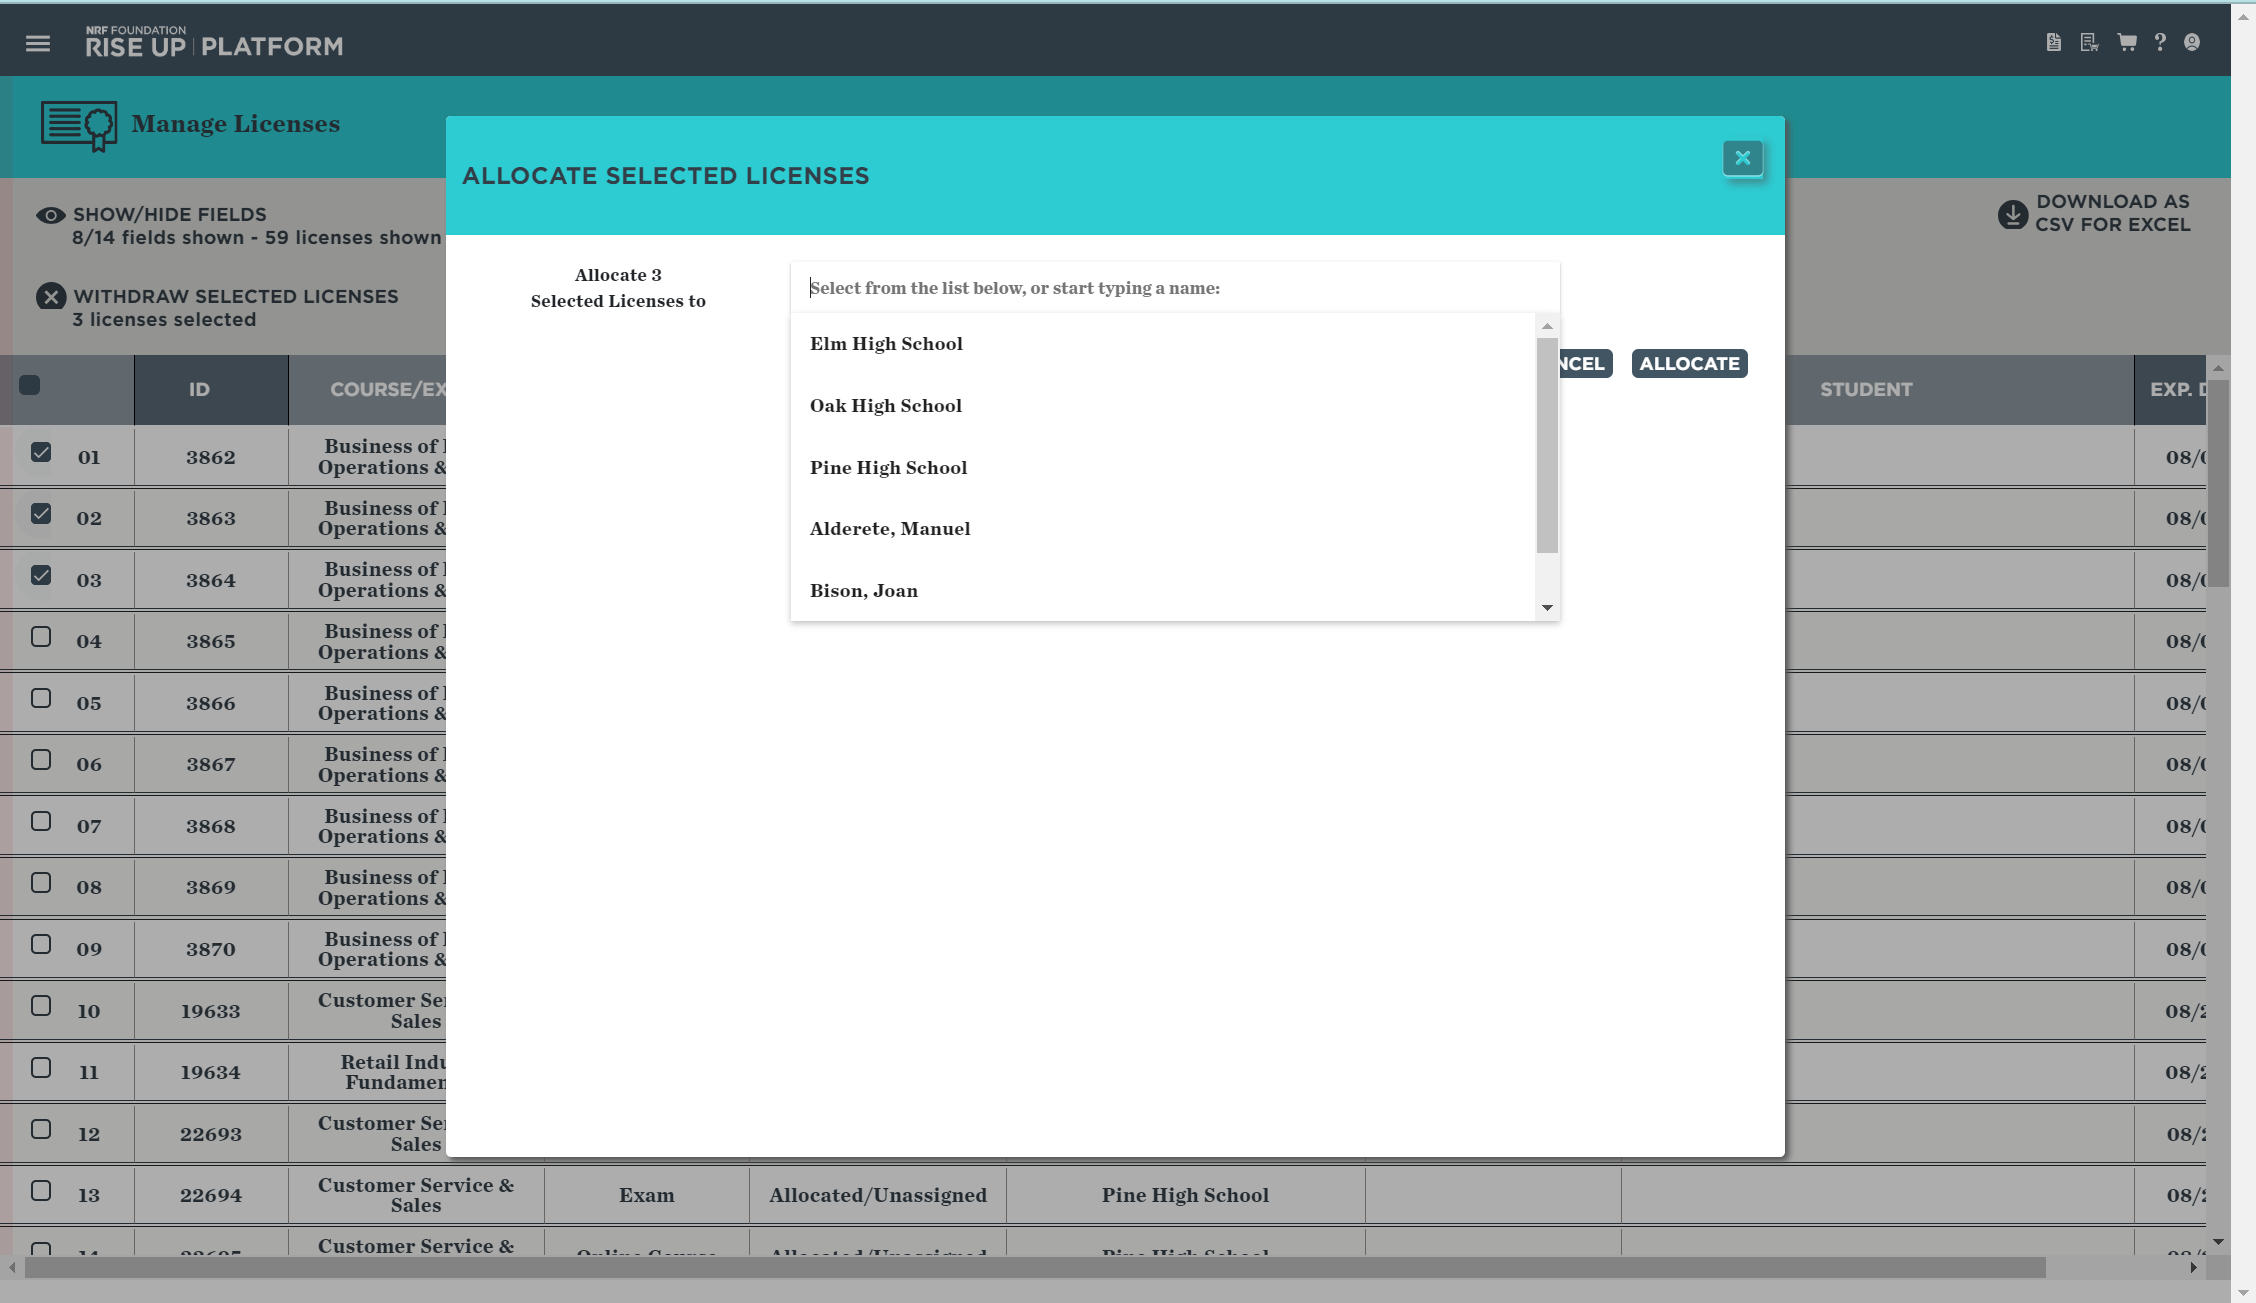
5. Click ALLOCATE. These licenses will be available to the recipient immediately, and they will still appear in your list on the Manage Licenses page in case you want to check their status or withdraw them.
